Happy Tuesday! I'm out of town this week to install a set of model homes - be sure to follow me on Instagram (@juliethigpen) as I'll be sharing sneak peeks of my work in progress! Because of my busy schedule, I've been reaching back into the Belle Maison archives for posts that had a great response from my lovely readers to share again. It's been fun looking back at certain posts to refresh and re-inspire me and hopefully you too. Enjoy!
Is it really possible to have a super organized kitchen, where you can always find what you need and have plenty of space for everything? Is it possible to open your pantry and smile because it's not only functional but looks amazing as well? I'm challenging myself to find out! After nearly 6 years of living with a small apartment kitchen, the cabinets are starting to bust at the seams and I've literally run out of even an inch more of space...I've had to start putting things in my bedroom closet because I'm flat out of room. However, instead of just accepting that I have a small kitchen with limited space and continuing to live in chaos, I've decided it's time to take control and tackle each cupboard, one by one, maximizing what I have to work with. Currently, I don't have any cabinet or shelf organizers and after researching online, there are endless gadgets and solutions for the kitchen. Why haven't I been using any of them?! I guess when you live in chaos for so long (like a messy closet), you rarely take the time to step back and assess the mess. It's time to start over and here are some ideas that have my brain spinning. I'll post my before and after photos as soon as this project is completed!
What about your kitchen? Is it neat and organized or messy and chaotic?
Tip #1: Your pantry can be organized and look pretty too. I love the idea of wallpapering or strnciling the back wall. Even a solid paint color would look great. [Image via
House of Smiths]
Tip #2: Maximize the use of shelving by creating dividers to store pans and trays on their side. This was created using curtain tension rods! [Image via
Martha Stewart]
Tip #3: Keep food fresh longer and make it easy to find what you need by putting everything in a plastic or glass container. You can use a label maker or print clear labels with your computer to identify each container. This maximizes the use of shelving space by allowing you to stack and place things side by side more efficiently. [
Image Source]
Tip #4: Use valuable wall space in a pantry by mounting bins to store snacks, supplies, etc. [Image via
Poppytalk]
Tip #5: Use the back of cupboard or pantry doors for even more storage! There are many easy-to-install shelving systems out there. [Image via
BHG]
Tip #6: Again, using clear jars to store food, pasta, spices, flour, etc. is an excellent way to maximize shelving space. Small baskets are great for holding smaller items and allow you to slide the basket in and out for easy access. [Image via
Pinterest]
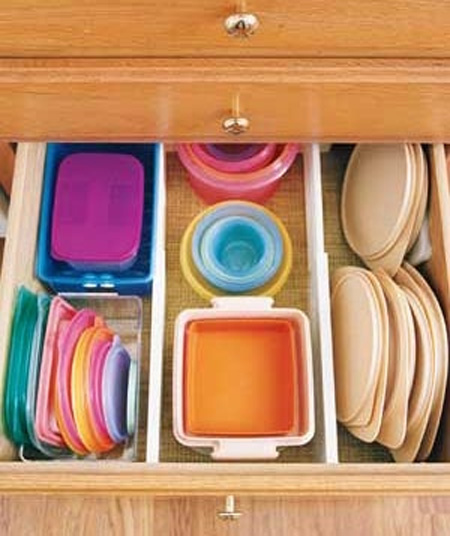
Tip #7: Maximize drawer space with dividers and containers to keep everything separated. [Image via
Real Simple]
I planned on doing a round-up of several great storage gadgets I'd love to purchase, but my son just woke up from his nap so I must run :( Maybe I'll share another day! In the meantime, some great places to shop for kitchen storage are:
The Container Store //
IKEA //
Rubbermaid //
Amazon //
Target. For more ideas, visit my Pinterest board:
Organizing.